Showing posts with label Michaels. Show all posts

3.13.2010

For Kathy

Well, actually it's for Laura and Chris. I finally got them their wedding gift (only 5 months late). I think it may have been worth the wait if you ask me. I'd been trying for months to think of something special for L and C. It came to me when I got an e-mail from Snapfish about wrapped canvases being on sale. I've always thought wrapped canvas photographs were awesome so I checked it out. Even on sale, they were a little more than I could afford. I got to thinking that I could probably make a wrapped photo canvas myself with a little work.
So I started digging around the internet and got some ideas. I headed over to Michael's where I picked up some iron on transfer paper you can run through your ink jet printer.


Then I went on over to Joann's and purchased a yard of duck cloth. It's sort of like canvas, but not quite as thick.The last thing I needed was a frame to wrap the picture around. I poked around while at Michael's and Joann's but wasn't willing to pay $5 for a frame that wasn't the exact right size. That's when I went on over to The Home Depot. I bought a 2x1 that was around 6 feet long for 62 cents.
At this point I needed to figure out the photo (I actually ended up doing 3!) I wanted to use so I would know how big to make the frame. I looked at my pictures from the wedding and picked out 2 that I loved. I decided to make a third frame for a monogram I created with Word.

I don't own a saw, so I went to my parents' house and borrowed theirs. My dad couldn't find his miter saw, so my first attempt to make a frame was with a regular hand saw. This proved to work, but took forever to do one piece!


That's when I brought in the circular saw. It was slightly difficult to keep at the 45 degree angle I needed, but nothing some rasping and sanding couldn't fix. I got all my pieces cut in no time at all (plus a few extras just in case).


I found a square and started to piece together the different pieces. I roughly fit them all together to form 3 frames. I labeled each piece with a number and letter so that it would be easy to put them back together when I got home. I brought the square with me and used it to help make sure my frames would be good. I got out my handy staple gun and attached the frames.


After the frames were done, I got to printing out my photos. I had a few that didn't turn out so well, but I ended up with three transfers ready to be ironed on. It should be noted that the prints had to be a mirror image so that when they where ironed on they would be the correct direction. I definitely wasted one transfer by forgetting to do that.

Once they photos were printed and dried, I got out the duck cloth and ironed out the wrinkles. p.s. I had the iron on for this picture and took too long to take it. I was left with a nice burned in iron print that I had to cut off and throw away. Oops!


I carefully set my new transfers down and went to work with the iron. The hardest part was letting them cool down before peeling off the paper (and keeping the cat from pouncing on everything since I was working on the floor)!


Once cooled, I peeled back the paper and revealed 3 awesome photo canvases. At this point all that was left to do was wrap them around the frames. This was really easy actually. I pin tucked and folded in the corners, stapled them down, and they were done!


This was a really fun project and very budget friendly. Here's the breakdown.
Photos - free, I took them
Iron-on transfers - $4 with my 40% off coupon
Wood for frames - $.62
Duck cloth - $4 for the yard (this could have been even cheaper, but I forgot my coupon)
Tools - free, my dad owned the saw and I owned the staple gun

There you have it. 3 sweet photo wrapped canvases all for under $10! I will absolutely do this again.

2.08.2010

My lovely lamps

For those that don't know, I am a garage sale junkie. So last summer I stopped at a sale on my way to my aunt's house. I poked around a bit and found two great lamps. I got a steal of a deal at $4 for the pair. The thing that drew me to them was their roundness. I had been on the lookout for a pair of lamps for my headboard because I was tired of sharing one lamp for reading at bedtime. They were cute lamps, but needed some help. When I bought them, they were a somewhat boring color. I forgot to take a picture, but it was something like this.


I went to my local Ace Hardware to look for a new color for my lamps. They had a chart of all the colors Krylon makes in spray paint. I found a beautiful color called Ivy Leaf, but they didn't have it in stock. Many phone calls later, I finally found that Michaels (love that store!) had it in stock. I grabbed my 40% off coupon and headed over. A couple of coats later, my lamps looked brand new.


Next I needed to find the perfect shade. I had been looking all summer at garage sales, but tan or ripped or gaudy shades were all I could find. I happened into Ikea one day and found the Alfhild Fagel lamp shade design. Only problem was it wasn't in the size I needed. They had a big one (think floor lamp sized) and they had mini ones (think chandelier size). I asked and sure enough, they carried it in a mid size. I went to Ikea several times over the next few weeks and found one shade. I was starting to get irritated. Then I went online one day and what do you know, my shade had been discontinued! After much grumbling, I found one on e-bay. It was $40 instead of $20, but it was the perfect shade and I already had one. I figured since the lamps only set me back 4 bucks, I could splurge on the shades.

So for a grand total of around $70 (lamps, shades and paint) I got two great lamps. And p.s. they are three way lamps, even sweeter!

1.31.2010

Finally

I have been putting it off long enough. Time to post up. Once again in the spirit of being thrifty for x-mas, I made necklaces for all my girls. It was probably the easiest thing to actually construct, but hard to find the pieces I wanted. I started out thinking I would buy a bulk length of chain and split it myself for each necklace. Michael's and Joann's had a different idea. The only colors they offered in bluk chain were bright gold and bright silver. This was highly irritating considering they had several suggestion booklets at each retailer using beautiful antiqued silvers and bronzes. Why would you suggest making something with products you don't carry? Irritating. Anyway, after much searching I found some semi pre-made necklaces (on sale, thank you very much) that I cannabalized to get the chain I desired.


I wanted to make each girl a necklace unique to her. Seeing as how this was my first attempt at jewelry, I decided to keep it simple and do pendant necklaces. After several trips to the craft store and several more to assorted bead stores, I had what I wanted. The actual creation of the necklaces was ridiculously easy.

Step 1: Take off ugly pearl/ribbon strands from pre-made chains.

Step 2: Add pendants to necklace.

Step 3: Go back to the store and purchace a few jump rings. Some of the pendants had holes that were too small to allow them to move freely on the chain. Jump rings give you a go between from necklace to pendant.


Step 4: Wrap and mail! I was a bit late on this, but I believe it was within a week or two after christmas so it wasn't that bad.


I actually liked them all so well that I went back to Michael's and got a pre-made chain and my own pendant to make myself a necklace. Bonus, the chain was an extra dollar off. I adore a good bargain. All added up, I spent under $30 for 6 necklaces that were made with love. Gotta love that, right?


p.s. The necklace owners from left to right: Ann, Laura, Cole, Kathy, Traci and Al. In case you gals wanted to know what everyone else got.

11.21.2009

Speaking of that contest....

If you could go visit http://www.michaelscontest.com/uploads/1368and rate my stocking(a 5 would be much appreciated!), that would be very awesome. Thanks!!!

I couldn't wait

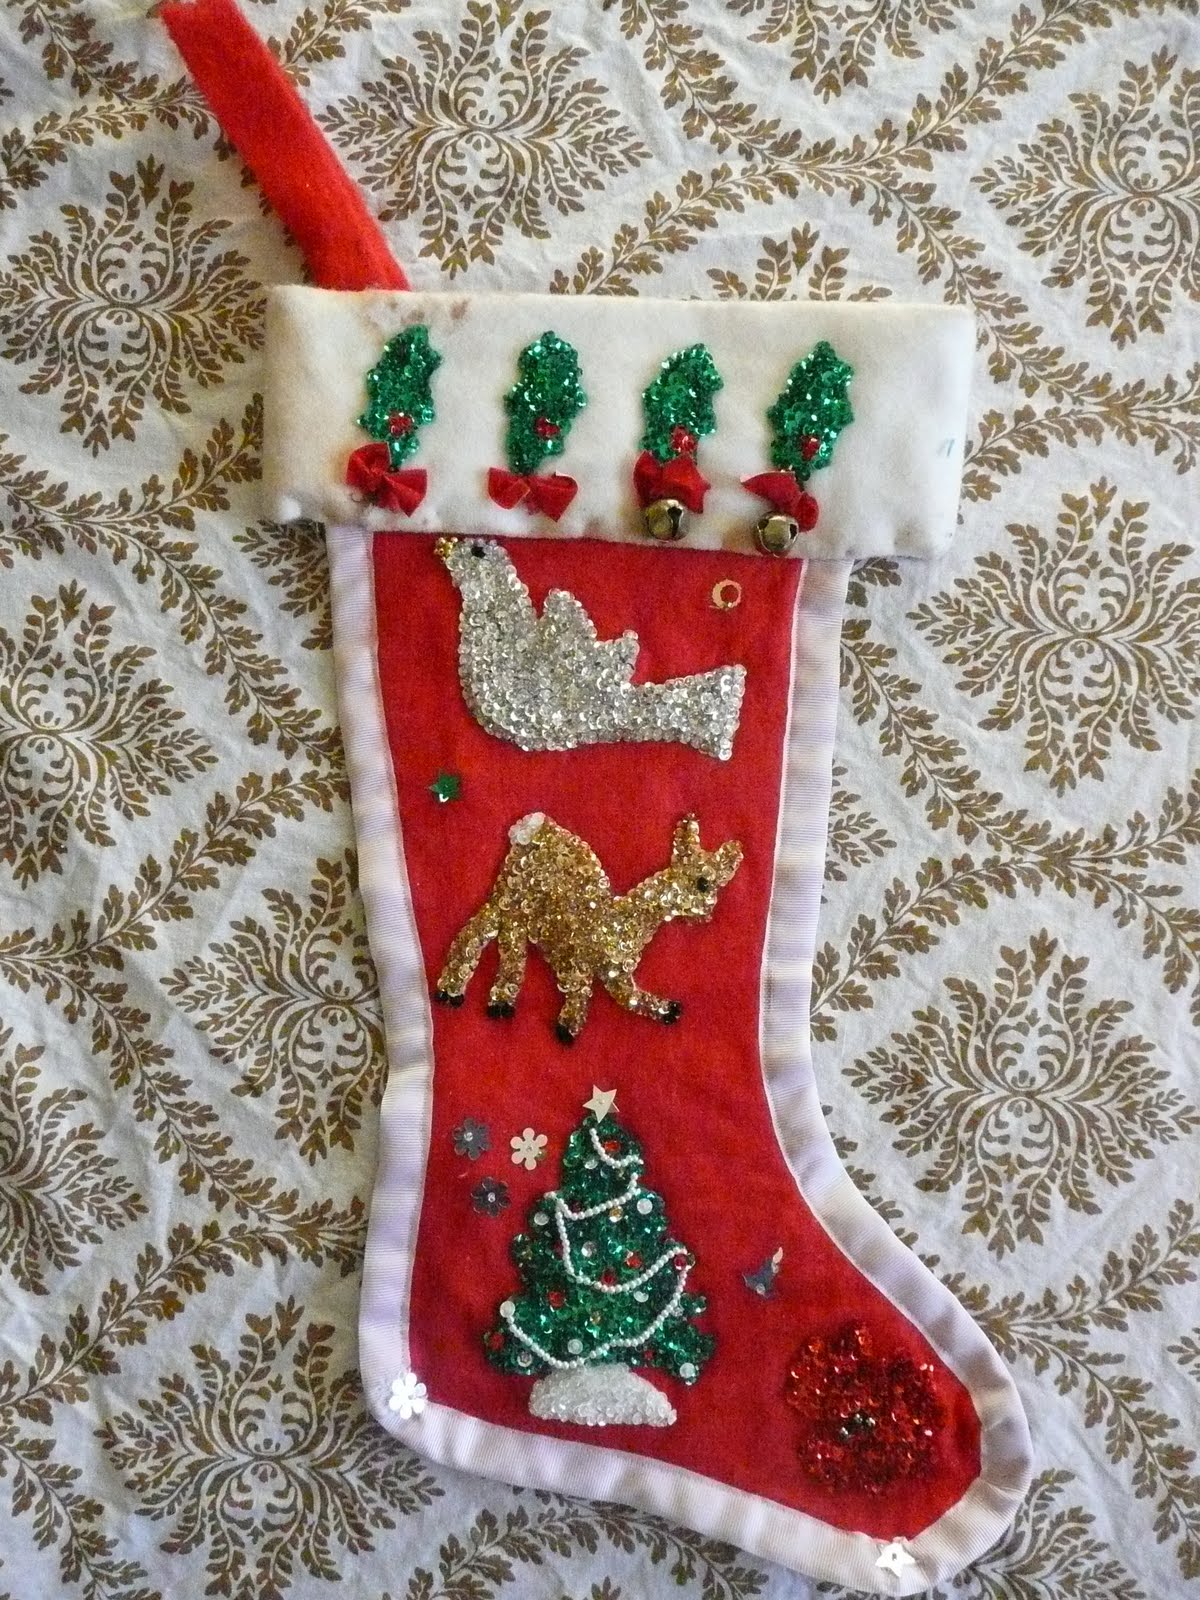
Sorry, but I couldn't wait to get going on christmas stuff! I also wanted to take these pictures for a contest that Michaels is having for home made crafts. They have 2 weekly winners that receive $100 Michaels gift cards. Then in February they're going to have 2 grand prize winners that get to fly out to NYC and visit The Martha Stewart Show! Swoon.... I thought it was getting close enough to christmas to enter my homemade stocking. My grandma started making these felt/sequin/beaded stockings way back when my mom was a tiny. Then when my generation was born, she continued the tradition. After she passed away, my aunts and my mom took up the mantle of making new stockings for each baby born in our family. I helped out with some of my baby cousins' stockings and when I married Jordan, I decided it was high time for me to make one of my own for him. Here are all of my fam's stockings. Notice how they get bigger and more elaborate as time goes on.

The front of Jordan's stocking.

The back. Jordan's Santa needed to be a rock star, clearly. Note how he's playing a blue bass, just like Jordan's first one. Putting two elements together like this was a new concept.

The fish is supposed to be for our wedding, since we got married in Barbados.

Everyone gets a candy cane.

Seeing as how Jordan is a mechanic and has always loved his first green pickup truck, I thought this would be cute. The hub caps are buttons from the collection I got from my grandma. Yup, the same collection I used for Finn's bunny. The head light bead was probably the most irritating part of the whole project. I bougth at least 6 different beads for it.

Everyone also gets a rocking horse, though the colors differ from stocking to stocking.

Here's the snowman. He's also a standard for all stockings. This one got a little ribbon bow tie, unlike some of the older stockings. He is also holding on to the popcorn strand that's off to decorate the...

tree! Jordan's is the first stocking where the different components interact so much.

Everyone gets a couple of holly leaves as well. They take the least amount of time to make, but still take about an hour each. This is the oldest of the stockings at our house. This is my mom's front. And the back.
My dad's.
The back.
Jessica's front. Her's started to fall apart, so we took off all the pieces and put them on a new stocking. We aslo added a silk liner, which I thought of to help keep some of the stress of a full stocking off of the felt. All the new ones are getting them.
The back.My stocking's front. Poor thing, it needs a new hanger. The back. And Brianna's front. And back.